I had so much fun making my first clipboard that I thought of making another clipboard. But this time I made it for someone. I just gave her the clipboard today. I made the clipboard the same way that I had for the first clipboard. I made a draft, but this clipboard was much more difficult than my first one. I also added some ribbon. I only used 3 kinds of ribbon. On the right is what it looked like when it was all done.
Friday, August 20, 2010


Saturday, August 14, 2010
Silly Bandz Sunprint
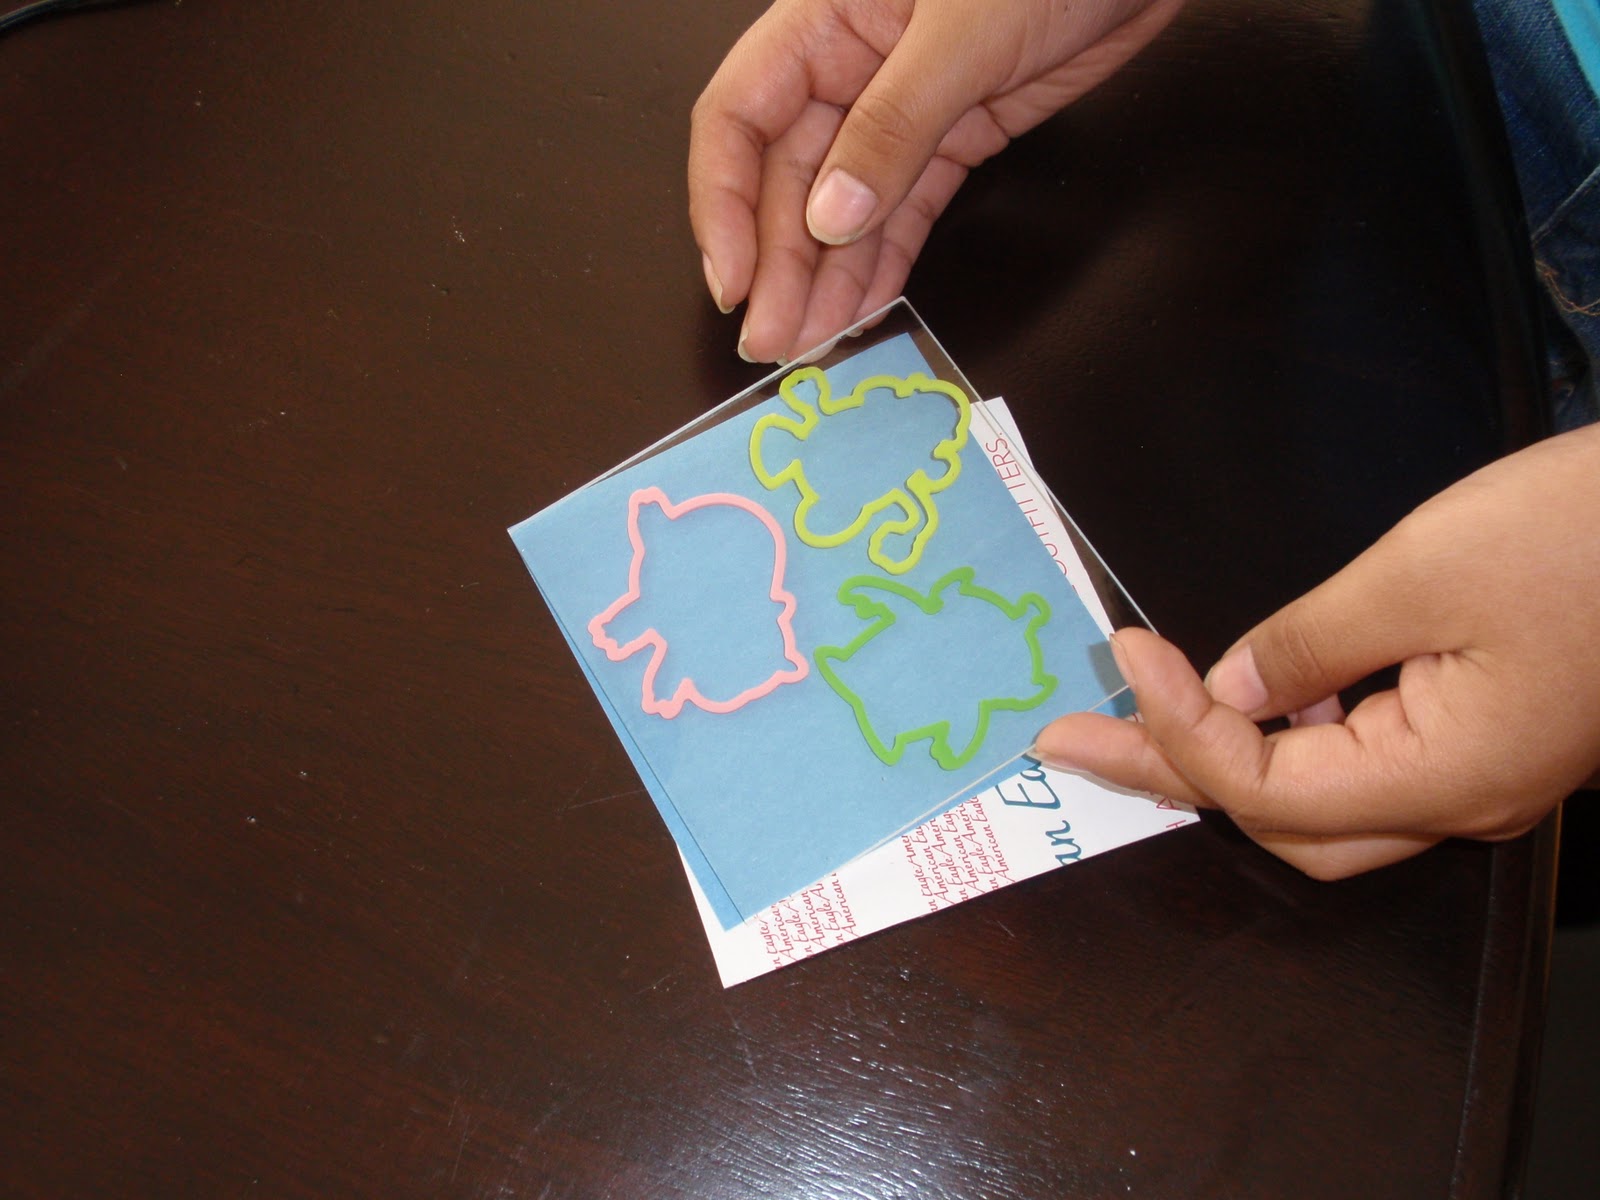
To all the people that know about Silly Bandz this craft is for you. Okay. Me and my mom stumbled upon this kit. It was called Sunprint Kit. Now if you have Silly Bandz then pick some of your favorite ones. Now that you have done that, you will take your kit. In the kit there is a acrylic sheet. Then you will find a piece of cardboard. You will cut the piece of cardboard the same size as the acrylic sheet. There is also a blue sunprint piece of paper in the kit. Next you will take cardboard and lay in on the ground. You will take the kit and get the blue sunprint paper and put the paper on the cardboard. You will make sure that the blue side of the paper is facing the ceiling before you put the paper on the cardboard. Now that you've done that you will put your Silly bandz on that paper. Then you will take the acrylic sheet and put it on top of the other stuff. The acrylic sheet will have a sticky piece of paper on both sides of the acrylic sheet so make sure that you take it off. Now that you've done that you will take it outside and leave it out there for a minute to 5 minutes. After you go get it, you will take the paper and run it under some water for a minute. Then you will place it on a table or a counter. Lay it flat on the ground to dry and you are done. The Silly Bandz leave a print on the paper after you take them off the paper.




Saturday, August 7, 2010
Clipboards

This week I made clipboards. All we got were some clipboards. (You can just us old ones that you have at home.) But back onto the list we got clipboards, scrapbook paper, glue stick, Mod Podge and a foam paint brash. It took me about 2 days but I bet if I worked harder it could have taken me 1 day.
Step 1
The first thing I did was draw what I wanted it to look like. After I did that I would mark where the main piece of paper would go.
Step 2
It would take a while to cut the pieces of paper just the right size.

Step 3
Then I would quickly lay the pieces of paper on the clipboard.
Step 4
I would then take the pieces of paper of the clipboard and glue the pieces on the clipboard.

Step 5
Use a sand block and sand the edges of the clipboard to make it so that the paper and the clipboard are smooth and together. (You have to sand down, not up. If you go up, it pulls the paper off the clipboard.)
Step 6
I would wait awhile before you put on 1 or 2 layers of Mod Podge. I put 2 layers of Mod Podge on the clipboard.
Step 7
You will wait about 10 to 15 minutes in between each painted layer of Mod Podge.
Saturday, July 24, 2010
Weaving


Okay this craft took me about 3 to 4 days to make. But if you work on it all day and put your energy into making the weaving, you can do it faster. My mom takes me to the craft store about every 2 weeks to get new supplies. The last time she got me some balls of yarn so that I could make the weaving. I used 2 kinds of blue string to make the weaving. But if I wanted to I could have used the other colors of yarn that my mom got me.
1. Pick your yarn colors.
2. The first thing I did was get a box and cut a BIG piece of cardboard.
3. cut a stick that is as long as your loom.
4. I used the piece of cardboard to make a loom.
5. All you have to do is cut notches out of the cardboard.
6. Then cut a long piece of yarn and tread the big needle.
7. You tape the end of the yarn to the back of the cardboard.
8. Then wrap the yarn in front of the cardboard then tape the other end of yarn to the other side of the cardboard.
9. Weave the string over and under, over and under, etc.
10. Once you are finished with one of the colors all you have to do is tie the other piece on.
11. When you are all done, tie the end of the string to the string loom.
12. Then you will take the string loom and cut the little loom loops in half and tie the two pieces of yarn.
13. After that you will take the stick and pull the string loops over the stick.
Sunday, July 11, 2010

Saturday, July 10, 2010
Boxes

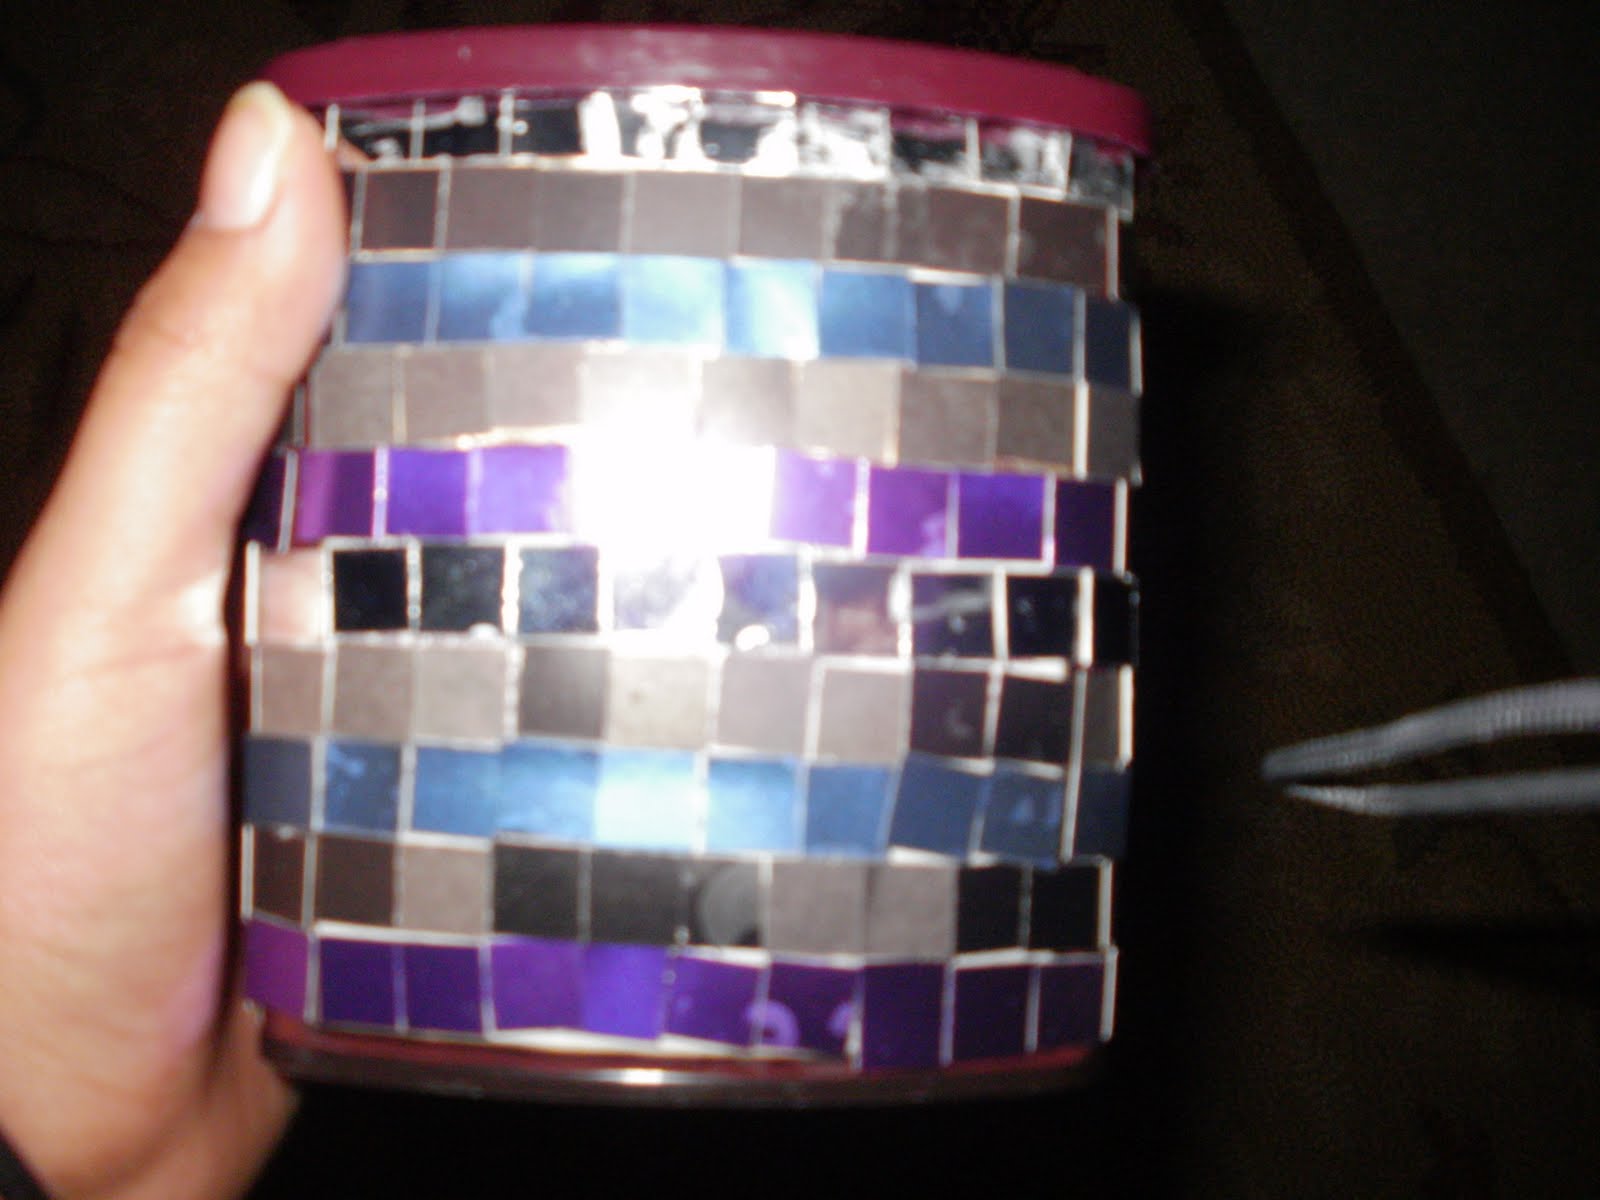
I got boxes and I decorated them with tissue paper and also with mosaic pieces. We recycled the boxes by decorating them. I got my boxes from all kinds of things. The 2 containers were Hershey's cocoa containers. But my parents also gave me coffee containers and water flavoring containers. So once we had used all the coffee or the water flavoring, my parents would give me the boxes.
It doesn't matter if your boxes are big or small. But if you do a big box it will take you much longer. It took me about 2 hours to make the mosaic and the tissue paper boxes and mine were not that big. They look easy and they are easy but they take a lot of time. So if you don't like to be patient or to take your time, this may not be the craft for you. But I do hope that you will try to make the craft because it looks really cool when it's done. To make the mosaic box, all you have to get is..... some different colored pieces of paper. Then you glue the pieces of paper all around the box. You will let the box dry for a while and that's how you make the mosaic boxes.
The tissue paper box was a little easier then the mosaic box. the first step is too wrap around about 5 to 10 piece of tissue paper. You will glue all the pieces all around the box. If you have a cuter paper hanging off the edges of paper you can just cut it off. This will take you a while to do. Then you can cut abut 4 to 6 pieces of tissue paper. You can cut the pieces of paper in any size and shape. you do not want to use to much glue on the paper. If you do use too much glue the paper will tear in to pieces of tissue paper and that's all the steps it takes to make a tissue paper box.
Saturday, July 3, 2010
4th Of July Sundae


I made a Fourth of July ice cream sundae this week because it was Fourth of July. You don't have to make them just because it was Fourth of July. You can make them anytime. They were vary good. I got the idea when me my sister and parents went to First Watch for breakfast. When we got there I saw a sign on our table that had a picture of a yogurt and granola Fourth of July meal. Well my mom said, "Why don't you go and make that for the blog?". But I did not want to so I asked if I could make a Fourth of a July ice cream sundae. She said, "Yes."
So the next day we went and got white and red ice cream from Jeni's. We got Riesling Poached Pear sorbet and Cherry Lambic sorbet. My dad also got me some whipped cream and some blueberries. We found our sundae cups. But you don't have to use sundae cups. You can just use a cup or a bowl. We let the ice cream thaw before we scooped the ice cream. You can scoop the ice cream in whatever order you want. I put the white ice cream on the bottom. Then I put the blueberries on. After that I put the reddish ice cream on. You don't have to, but I put whipped cream on top of the ice cream. You can even put some blueberries on top.
Subscribe to:
Posts (Atom)