
This week I made clipboards. All we got were some clipboards. (You can just us old ones that you have at home.) But back onto the list we got clipboards, scrapbook paper, glue stick, Mod Podge and a foam paint brash. It took me about 2 days but I bet if I worked harder it could have taken me 1 day.
Step 1
The first thing I did was draw what I wanted it to look like. After I did that I would mark where the main piece of paper would go.
Step 2
It would take a while to cut the pieces of paper just the right size.

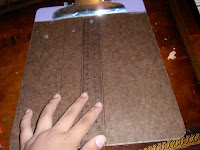
Step 3
Then I would quickly lay the pieces of paper on the clipboard.
Step 4
I would then take the pieces of paper of the clipboard and glue the pieces on the clipboard.

Step 5
Use a sand block and sand the edges of the clipboard to make it so that the paper and the clipboard are smooth and together. (You have to sand down, not up. If you go up, it pulls the paper off the clipboard.)
Step 6
I would wait awhile before you put on 1 or 2 layers of Mod Podge. I put 2 layers of Mod Podge on the clipboard.
Step 7
You will wait about 10 to 15 minutes in between each painted layer of Mod Podge.
Dear Ana,
ReplyDeleteI am going to be teaching third grade this year and I think my students would love to make their own clipboards! What a great idea! I especially like the details you added to help the reader know exactly what to do. I'd also like to show your blog to my students to give them an idea for their own blogs.
Great explanation, Ana. Thanks for posting this--now I want to make some pretty clipboards, too.
ReplyDeleteThis post is just in time for school. I love the idea of personalizing a clipboard. Those brown ones that you buy at the store are just so boring!
ReplyDeleteYours is very creative.
I appreciated your very clear directions. It made me think that I could make one of these clipboards too.